A Berry Good Summer
August 13, 2012 § 3 Comments
The science of nutrition is completely undervalued. The more I learn about the body and how food affects our overall daily health and life expectancy, the more I am convinced of the importance of eating fresh, locally grown and organic fruits and vegetables (and, conversely, less processed and packaged foods).
I do, however, have a conflict or two. For one, I believe in birthday cake. When Oprah announced that she did not have one bite of her birthday cake at her 50th birthday bash, I was shocked and appalled. Birthday cake on your own birthday, at any age, should be indulged in without guilt or shame. When you are young, it is even better! My 4 year old niece celebrated with BOTH a yellow cake and an ice cream cake. Why should any young birthday girl have to choose?
I was concerned last week that Bus Boy, working in London and a notorious “I don’t like sweets” person, would not have his own birthday cake on his special day. Therefore, I took it upon myself, from across the pond, to find the best birthday cake baker in London. After much research I found the bakery Konditor & Cook. After reading about the bakery’s “…commitment to quality; organic free-range eggs and natural butter…” in all of it’s baking, I was convinced that Bus Boy must have their “Curly Whirly” birthday cake. After the Skype phone call to confirm all of the details, including that Bus Boy’s full name be spelled out on the cake (a long name difficult to fit on 7 inch cake), I was assured that he would enjoy a birthday celebration highlighted by the best birthday cake London had to offer!
I was so excited about Bus Boy’s cake that I could hardly wait to hear about the surprise delivery to his office. After placing the order, panic set-in when I considered that, perhaps, his place of work did not allow food deliveries! All I could do was wait for Bus Boy’s call. On his birthday, around 4PM, Bus Boy received a call from security announcing “We have a cake delivery for you. We put it through the scanner and it seems to be in one piece.” When Bus Boy went to receive the cake he was informed that this was the first time a birthday cake had been delivered and, like any other package, all of the usual security measures were followed. And, yes, it was in one piece and soon to be cut into several pieces for his office to enjoy!
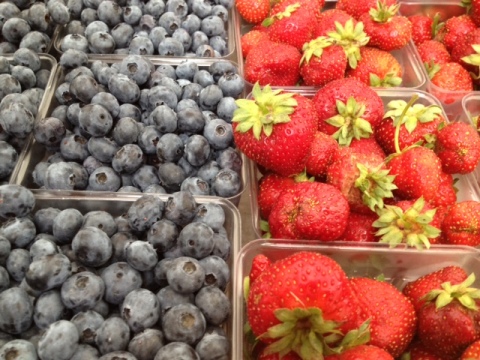
Indulging in cake at your own birthday is one thing. Eating birthday cake at every birthday celebration you attend during the year is another. What are you to do? Fresh fruit is a good alternative! In-season, local and organic fruit is just as sweet and delicious as birthday cake and can be enjoyed every day while in season. I include myself in the masses who revel in the summer months when berries invade the farmer’s markets and grocery stores.
My excitement is at its peak during the strawberry and blueberry season –often only a few weeks apart and sometimes even overlapping for a week or two. Having a large bowl of wild strawberries and another large bowl of plump blueberries sitting in my kitchen is true heaven. While I like to eat my berries alone as a snack or as a dessert, I was curious to research interesting recipes highlighting each fruit individually.
Finding dessert recipes for both strawberries and blueberries was not a problem. The Internet was filled with strawberry pie recipes, blueberry jam recipes and the like. More interesting to me, however, were a delicious blueberry and quinoa salad recipe and a roasted strawberry recipe.
The blueberry and quinoa salad recipe is highlighted by the salty, strong flavor of blue cheese and the fresh taste of mint. The combination of these ingredients makes the salad full of protein, fiber and antioxidants. The mixture is truly a heavenly combination of nutrition and taste. This is a great choice for a summer picnic salad or an indoor rainy day salad.
I tried two roasted strawberry recipes that differed significantly from seemingly small ingredient adjustments. The first recipe I tried called for pepper while the second recipe called for Port Wine and Balsamic Vinegar. The pepper cuts the sweetness of the strawberries allowing the soupy berries to be served alone, with a dollop of crème fraiche or alongside ice cream or pound cake. Alternatively, the Port Wine and Balsamic Vinegar makes the roasted strawberries too sweet, in my opinion, to eat alone and begs for a savory pairing. Serving these roasted berries atop a spinach and walnut salad, alongside a wedge of brie or swirled in a Greek yogurt is divine. For those with a sweet tooth these strawberries would make a delicious addition to a quality vanilla bean ice cream or atop a buttermilk biscuit with fresh whipped cream. For those with the time and curiosity I would suggest making both recipes!
Whether you are enjoying an August birthday with cake or experimenting with roasted strawberry recipes enjoy these last days of summer with gusto!
Blueberry, Blue Cheese and Quinoa Salad
Published 2010. Adapted from Naked Beet, “Red, White, And Blueberry Salad” for Food 52.
Yield: 4 Servings
Ingredients
- 1 cup uncooked red or white quinoa
- 2 cups fresh blueberries
- 5 ounces blue cheese
- 3 tablespoons fresh mint, chopped
Instructions
- Rinse uncooked quinoa in cold water. Place wet quinoa in a pot and stir constantly over low heat until the water evaporates and the quinoa releases an odor similar to the smell of popcorn – about 5 minutes. Add 1 ¼ cup of water to the pot and bring to a boil. Once boiling lower the heat to bring water to a simmer, cover and let stand over the heat for 8-10 minutes. The water will be completely evaporated and steam will be rising from holes when done.
- Cut the blue cheese, mint and place this in with all the blueberries into a large bowl.
- Cool the quinoa before mixing in the cheese, blueberries and mint (otherwise your blue cheese will melt.)
3 Ideas for Blueberry, Blue Cheese, and Quinoa Salad:
- Add walnuts for another layer of flavor and some crunch!
- Switch the Blue Cheese for Feta Cheese for an even healthier salad. Feta Cheese has the same salty flavor and a similar texture to blue cheese minus some of the fat!
- Try strawberries in the salad instead of or in addition to the called for blueberries.
Roasted Strawberries with Black Pepper
Published April, 1999. Michele Anna Jordan For Epicurious
Yield: Serves 4
Ingredients
- Roasted Strawberries with Black Pepper
- 2 pint baskets strawberries, stems removed
- 3 tablespoons sugar
- 1 tablespoon freshly ground black pepper
- 2 tablespoons balsamic vinegar
Instructions
- Rinse the strawberries in cool water, place in a strainer or colander, and shake off most of the water. Slice the strawberries about 1/8 inch thick, place them in a large bowl, and sprinkle them with the sugar.
- Cover and refrigerate for at least 1 hour and up to 4 hours.
- Preheat the oven to 375°F. Toss the strawberries with the black pepper, add the balsamic vinegar, and put the strawberries and all of their juices into a large saute pan or a large ovenproof dish. Roast for 8 to 10 minutes, until the juices are bubbling and the strawberries are hot but not mushy. Divide among individual dishes and serve immediately.
3 Ideas for Roasted Strawberries with Black Pepper:
- Add twice the recommended pepper for more spice.
- Add a dollop of crème fraiche for a sophisticated dessert.
- Pair with pound cake or ice cream for a sweet dessert with an unexpected peppery twist!
Roasted Strawberries with Port and Balsamic Vinegar
Adapted from Heidi Swanson’s Roasted Strawberries in Super Natural Everyday. Ten Speed Press, 2011
Yield: Serves 4
Ingredients
- 8 ounces small to medium strawberries, hulled
- 2 tablespoons maple syrup
- 1 tablespoon extra-virgin olive oil
- ¼ teaspoon fine-grain sea salt
- 1 tablespoon port wine
- A few drops balsamic vinegar
Instructions
- Preheat Oven to 350 degrees Fahrenheit with a rack in the middle of the oven. Line a rimmed baking sheet or large oven-proof dish with parchment paper.
- Cut each strawberry in half, place in a mixing bowl and set aside.
- Whisk together maple syrup, olive oil and salt in a small mixing bowl. Pour over strawberries and very gently toss to coat. Arrange berries in a single layer on the baking sheet.
- Roast for 40 minutes, just long enough for the berry juices to thicken, but not long enough for the juices to burn. Keep an eye on the edges of the pan for burning!
- While still warm, scrape the berries and juices from the pan into a small bowl. Stir in the port and balsamic vinegar. Use immediately or let cool and store in the refrigerator for up to a week.
3 Ideas for Roasted Strawberries with Port and Balsamic Vinegar:
- Add to a spinach, goat cheese and walnut salad for a new take on the usual salad.
- Top a wedge of brie with the warm berries for a special addition to your cheese plate.
- Mix the berries into plain Greek yogurt for a healthy dessert or a fun breakfast alternative!
A New Addition To Asparagus
June 23, 2012 § 1 Comment
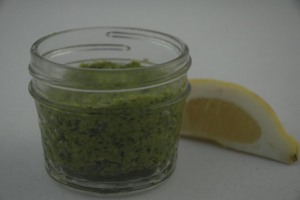
My leftover asparagus from last week’s raw salad recipes led me to experiment with asparagus-inspired sauces. My greatest success is an asparagus pesto adapted from a New York Times recipe published May 7th, 2010. In an effort to highlight the asparagus taste and pack the pesto with a healthy and spicy punch I included spinach, quadrupled the garlic, substituted pine nuts for walnuts, halved the extra-virgin olive oil and nixed the Parmesan. The result was truly heavenly.
Three advantages to my recipe are less calories, more fiber, iron and potassium (thanks to the addition of spinach) and without the addition of Parmesan this pesto is easy to freeze. Just pop the pesto in an air-tight container and enjoy it any time of year! My favorite air-tight, freezer-ready container is a simple mason jar that you can find at groceries stores or wherever canning supplies are sold around the country or simply buy online.
Asparagus Pesto
Adapted from The New York Times, May 7th, 2010
Salt
1 Pound asparagus, trimmed and cut into 2-inch segments
3 Handfuls baby spinach leaves (about 3 cups)
4 Clove garlic, peeled
1 Cup walnuts
2 tablespoons extra-virgin olive oil, plus more as desired
Freshly ground black pepper
Juice of 1/2 lemon, or to taste.
1. Bring a large pot of water to a boil, salt it and drop the asparagus spears into the pot. Cook the spears for 2 to 3 minutes until they are are bright green and barely tender. Drain the spears and rinse immediately under cold water (to stop the cooking).
2. Transfer the asparagus to a food processor and add the spinach, garlic and walnuts. Process the mixture and, with the motor running, add the olive oil. Stop to scrape down the sides of the container if necessary. Once a paste is formed add the lemon juice, pepper and salt to taste
Yield: 4 to 6 servings (about 1 1/2 cups).
3 Ideas for Asparagus Pesto
- Asparagus Pesto Quinoa: Toss an equal amount of Parmesan cheese and pesto to quinoa. Mix well. Approximate 1-2 tablespoons Parmesan cheese and 1-2 tablespoons of pesto to 1 cup of cooked quinoa.
- Asparagus Pesto Whole Wheat Pasta: Drain and toss hot freshly cooked pasta with asparagus pesto and finish with a sprinkle of Parmesan cheese and crushed walnuts. Approximate 1 tablespoon of pesto for 1 cup of pasta.
- Asparagus Pesto Bruschetta Spread onto grilled vegetables or toast and sprinkle with micro-chopped asparagus for a side course or appetizer.
A Spring Fresh Start
June 15, 2012 § 1 Comment
Pictures of snow-covered roads in Kosovo were followed by pictures of rainy days in London. The decision to move from Kosovo to London was not easy –for me, that is. Our storybook meeting was meant, I thought, to end with happily ever after in New York City. The dangerous snow-covered roads of Kosovo, lack of electricity, lack of communication and sparse time together was to be an adventure that helped define our courtship. I envisioned late nights of cooking, eating and political discussions. Have I mentioned Bus Boy’s aspirations in the political arena? On our first date he looked me straight in the eye and explained to me his vast plan to step-by-step make a difference in his country. My usual response when someone makes bold, sweeping Mother Theresa-like statements about their future is to smile and laugh a little inside. There was something about Bus Boy’s tone, ease and self-confidence, however, that made me believe he would deliver on that promise – that and the fact that he had a plan. As a planner myself, I respected his thoughtful ambition. Neither he nor I considered, on that first date, that we would have to factor each other into our carefully made career plans.
The perfect job offer that fit exactly into Bus Boy’s goal warranted a discussion. A week of marathon long conversations over the phone followed by a week of endless conversations in person during a New York City visit ended with the only answer that made sense. Bus Boy needed to accept the job in London to take another step toward his future goals. For the moment, I needed to stay in New York City. One more year of Skype conversations and long emails seemed difficult but not unreasonable. If John and Abigail Adams (my favorite figures in American History) could be apart for months at a time in the 18th Century with only letters to keep them in contact we could certainly do the same in the 21st Century. And so, eight weeks later, Bus Boy and I bought I-phones (to capitalize on the free text messaging between phones), adding an additional way to communicate.
My last text message from Bus Boy asked, “What are you buying at the Farmer’s Market today?” I sent him back this picture:
It seems like only yesterday that I wrote the epic asparagus post in Simmer InTheCity reviewing steamed, grilled and roasted asparagus preparations. After months of experimentation last year and a few weeks of experimentations this year, I can, without a doubt, proclaim that boiling, steaming and roasting asparagus is the easiest preparation for COOKED asparagus.
To Boil:
Lay asparagus in a single row in a skillet. Cover the asparagus with salted water, cover the skillet, and turn the heat to high. Cook for 2-5 minutes or until the widest part of the asparagus stalk can easily be punctured with a knife.
To Steam:
Boil 1 inch of salted water in a medium pot (the taller the better). Stand the asparagus up in the pot. For the easiest strategy you can tie the asparagus together with a rubber band. Cover the pot and allow the asparagus to cook for 2-5 minutes or until the widest part of the asparagus stalk can easily be punctured with a knife.
To Roast:
Preheat over to 450 degrees. Lay the asparagus in a single row in a roasting pan, lightly drizzle with olive oil and sprinkle with salt. Turn the asparagus once. Roast until the widest part of the asparagus stalk can easily be punctured with a knife, 10-15 minutes.
There is only one preparation easier than cooking asparagus and that is preparing RAW asparagus. This year I experimented with two easy raw asparagus recipes that will satisfy as a light first course or, with a little doctoring, a full meal.
No matter how you eat asparagus the nutritional benefits of the vegetable are undeniable. To get all of the information you need on identifying, buying and storing asparagus as well as a complete nutritional summary go to my new blog, Satisfy InTheCity.
Shaved Asparagus and Avocado Salad
Adapted from Epicurious.com, Asparagus and Avocado Salad
1-pound thick asparagus spears
1 avocado, halved and pitted
16 fresh mint leaves, chopped
1 lime, juiced
1 -tablespoon extra-virgin olive oil
Pinch of salt
Pepper
Snap the bottom of each asparagus stalk and lay the asparagus on cutting board. Working with 1 asparagus stalk at a time, press the asparagus into the cutting board and use a vegetable peeler to shave spears into long, thin shavings.
Combine lime juice, extra-virgin olive oil, a pinch of mint leaves and salt.
Divide the asparagus strips among 4 plates. Cut each avocado half into 4 sections and place 2 wedges on each salad. Sprinkle with dressing, more mint leaves and pepper as needed.
Shaved Asparagus and Parmesan Dressing
Adapted from Epicurious.com, Shaved Asparagus and Parmesan Vinaigrette
1-pound thick asparagus spears
¼ cup finely grated Parmesan
1 lemon, juiced
2 -tablespoons extra-virgin olive oil
Pinch of salt
Pepper
Snap the bottom of each asparagus stalk and lay the asparagus on cutting board. Working with 1 asparagus stalk at a time, press the asparagus into the cutting board and use a vegetable peeler to shave spears into long, thin shavings.
Combine lemon juice, olive oil, Parmesan, salt and pepper to taste. Drizzle dressing over shaved asparagus and toss to coat. Divide asparagus among plates and serve.
3 Ideas for Shaved Asparagus and Parmesan Salad and Shaved Asparagus and Avocado Salad:
- Add 1 cup of cooked red or white quinoa or cooked white beans
- Add a few stalks of steamed asparagus cut into 1- inch pieces, tomatoes and/or peppers.
- Add a handful of walnuts or pine nuts
And the Saga Continues….
May 21, 2012 § 4 Comments
Bus Boy’s visits to New York City, his move to London and the subsequent adjustment to our new Skype schedule (there is only a five hour time difference!) kept me from cooking and writing this winter. I wrote but did not cook and then cooked but did not write. It was a vicious cycle that continued until last week when Bus Boy visited me in New York for my birthday. With family and friends we celebrated by enjoying another Pizza Tour and discovering more great New York pizza. All the talk of seasonal tomatoes and canned tomatoes; sauce and simple tomato puree; and thick crust and cracker-thin crust made me yearn for the days of our experimentation. Then, at the end of the tour, my friend turned to me and said, “what ever happened to your blog!” The only thing I could say was, “I don’t know….” And so, Bus Boy and I contemplated the question until we decided to continue on this journey together as a cooking team. I will cook and he will tell me stories and together we will post the latest stories of our lives.
First, however, I am sharing a post I wrote (but never published) in February. Bus Boy was finishing his time in Kosovo with an unforgettable series of events and mishaps and I was in a winter soup frenzy. I hope you enjoy the soup as much as the story.
February 2012:
Nothing says winter like a good old-fashion snowstorm – the kind of storm that spreads a blanket on the city streets and you can almost hear the snowflakes fall. The most enchanting sight from the window of my small apartment is children in full-length snowsuits with their sleds taking ownership of the streets. This year, however, there have been more rainstorms than snowstorms. My down-filled full-length coat has remained mostly in the closet. In any other year, I would have nodded in agreement as people on the subway spoke about the affects of global warming. Bus Boy (and the New York Times) shares an entirely different story about frigid temperatures in Eastern Europe.
There are not snowstorms in Kosovo as much as days that turn into weeks of continuous snowfall. Bus Boy recently wrote to me, “It is as if someone soaked the whole of Kosovo with two inches of water and then immediately flipped a switch freezing everything in sight.” At least 50% of the roads in Kosovo are unusable, cutting small villages off from any connection to the rest of civilization and leaving them with no water or electricity for days. The rest of the roads are a dangerous invitation for an accident. Bus Boy’s destiny with disaster started with a fall in front of a coffee shop and escalated to losing control of his car on the icy roads.
That is Bus Boy’s truck standing practically vertical (he escaped safely and no one was injured) over a snow -covered wall. There is no dramatic story that accompanies the picture, just a succinct email message from Bus Boy that read, “There are no plows in Kosovo.” Luckily for the people in Kosovo (in my humble, unbiased opinion), day after day Bus Boy attempts to “break a road” to a village by compacting the snow with his truck as he attempts to reach people stranded in their homes. He wrote, “These villages are lucky to have a crappy little banger. There is no way anyone is getting out. I have a truck and still I get stuck. But still, my colleague and I battle the negative 20 degree weather for the sake of a makeshift road – or should I say path.”
Bus Boy is shoveling people free from the snow encapsulating their homes. I am humbled as back in the United States I go about my daily routines. When we speak, however, Bus Boy always encourages me to discuss my day with him and my research on fruits and vegetables. I recently explained that I used to think the typically pale color of winter fruits and vegetables made them seem depressing and dreary compared to the vibrant colors of the fruits and vegetables of summer. I was determined to experiment until I found the best ways to make winter fruits and vegetables come to life. When I did, all of a sudden the bold, strong flavors, often seemingly locked inside, exploded to the surface. Carrots are one of my favorite success stories.
Last winter I re-discovered the sweet taste of carrots by grilling and roasting them. I made different variations on carrot soup and built raw salads that combined, for example, carrots, beats and orange slices with the right vinegars, oils and yogurt- based dressings. My motivation to continue to study carrot recipes comes not only comes from their place on the winter vegetable list (almost everyone has access to carrots!) but also from their health profile. Click HERE to read about the health benefits of carrots in my new blog, “Satisfy InTheCity”
This week I looked through all of my carrot recipes and decided to focus on carrot soups. The distinct flavor of carrots just bursts in a soup. I was apprehensive at first about trying what has become my favorite carrot soup recipe because it included oats. Oats seemed like an odd addition to a creamy soup. I realized the genius of the recipe, however, as I blended the oats into the soup and watched as they gave it a special consistency. Oats also allow for the soup to be heart healthy and waistline friendly. Nothing can beat a recipe that makes your family, friends and guests either question if they should indulge in a spoonful or two or allow themselves to unabashedly finish the entire bowl. You can proudly proclaim that no cream was necessary to make this perfectly delicious bowl of soup and watch as everyone enjoys!
One of the best parts of soup recipes is that you can make enough for a week or two! Soup stays fresh and tasty in your refrigerator for a week or more when stored in the correct container or can be frozen for enjoyment months in the future. To store your soup in the refrigerator I suggest using a glass hermetic storage jar.
I prefer the 1.6qt hermetic storage jar – any size will due depending on soup quantity and refrigerator size – to keep my soup fresh and my refrigerator organized – the perfect combination!
Whether you plan on making carrot soup for dinner tonight or for a dinner party in three weeks you will not be disappointed. This is a great go-to recipe you will enjoy for years to come.
XO,
Tory InTheCity
“Creamy” Carrot Soup
Yields approx. 6 cups
Ingredients:
2 tablespoons extra-virgin olive oil
1 large onion (about ¾ pound) cut into medium dice
½ teaspoon salt
2 pounds carrots, peeled and cut into ½-inch rounds
5 cups stock
¼ cup rolled oats
lemon juice, to taste
ginger juice, to taste
ground cumin, to taste
Procedure
- In a medium pot, heat oil over medium heat. Add onions and salt. Sweat until onions are softened (about 5-8 minutes). Stir often to prevent browning.
- Add the carrots, cover pot and cook over low heat for 5 to 6 minutes. Stir to prevent browning.
- Add stock and oats to pot. Raise the heat and bring to a boil. Reduce heat to low and simmer 25 minutes, covered, until carrots are very tender.
- Blend the soup until creamy. Add additional stock to desired consistency.
- Add lemon and ginger juices, and cumin to taste. Adjust seasoning as necessary.
Prime Time Fruits and Vegetables
February 3, 2012 § Leave a comment
While Bus Boy’s lack of access to exotic ingredients in Kosovo inspired recipe simplicity, my weekly trip to the farmer’s market in 2011 made me appreciate the movement to eat seasonal and local fruits and vegetables. Local fruits and vegetables have fuller flavors. They are typically grown using fewer chemicals and pesticides and also are usually cheaper. In my experience, a cart full of seasonal fruit is almost a third cheaper than buying the same fruit out of season from other parts of the world.
While exploring new ideas for Simmer in the City’s 2012 cooking challenge, I began to wonder if some fruits and vegetables peak within a specific month in their growing season. For example, leeks are defined as a “winter” vegetable but are leeks tastier in February than they are in December? My research revealed that the answer is “yes.” In 2012, therefore, I have refined my challenge: I will cook with the best locally grown fruits and vegetables each month. I will draw inspiration from newspapers, magazine, websites and the many cookbooks on my shelves. By the end of the year I hope to have discovered how to best prepare seasonal fruits and vegetables when they are at the peak of their flavor and to have completed a collection of seasonal recipes we all can enjoy.
This year’s cooking story begins with one of the most recognizable vegetables in the world – carrots! Stay tuned for all the information on carrots you can digest – and my continued life story with Bus Boy!
2011 Ends With Memories and Recipes
February 1, 2012 § 1 Comment
Bus Boy and I are experiencing technical difficulties. For reason that can only be speculated, Bus Boy finds himself with no electricity, heat or hot water more times than not – forcing him to depend on his office for light, the gym for hot water and various restaurants for sustenance. I often imagine him after a long day of work and a tricky drive home in the snow trudging up the stairs to his apartment only to be welcomed by cold and darkness. Consequently, we construct creative ways to stay in touch. Bus Boy’s latest trick is to leave the light switch “on” when he goes to bed so that in the event that the electricity is restored the bright room light will wake him and allow him to call. I keep my phone by my bed in anticipation of those rare occasions. When we do talk, we have learned to convey our thoughts quickly knowing that the line may be cut again at any time.
When days pass without the chance to speak we resort to writing letters, albeit via email. I find it amazing that while I am in New York and Bus Boy is in Kosovo the only reliable way for us to be a part of each other’s lives is through letter writing. Bus Boy reminds me that many romances have been documented through letters. Perhaps, this correspondence will become part of our history that we will reflect upon and laugh about someday.
Near the end of December I re-read my correspondence with Bus Boy. There are so many parts of our 6-month history, played out in writing, that make me reflect and laugh about our time together. The email I sent to my friend Peggy at 2AM the night we met telling her, “The boy at the bus stop just signed-up for my blog. Now what?” and the email he sent to me the morning after our second date asking, “Shall we meet again tonight?” both make be smile nostalgically. The emails from Kosovo, however, are the most colorful.
Just a week before Bus Boy came to Worcester, MA for his first ever Thanksgiving he wrote, “Did you know that the modern day US Thanksgiving originated in MA?” I laughed, very loudly! I spent my entire year in the fourth grade roll-playing as a pilgrim named Abigail for a social studies project. My class spent several days on Plymouth Plantation as our assigned “characters” and we even acted out the first Thanksgiving dinner. It is safe to say that every Massachusetts resident is proud of the state’s role in the history of Thanksgiving. After his Thanksgiving with my family, Bus Boy returned to Kosovo and learned that Kosovo celebrates “Thank You America Day” on Thanksgiving.
His email with descriptive pictures of American flags filling the streets and the crowds around the statue of President Bill Clinton will not soon be forgotten.
More recently, Bus Boy forwarded me an email he received from UN security that warned him to take “hard cover” on New Year’s Eve to avoid stray bullets shot into the night’s sky. Luckily Bus Boy was not injured from either stray bullets or from the rocket-sized fireworks children were launching in the middle of the street – with water nowhere in site!
This Blog has told the story of my cooking adventures in 2011 – just like my letters with Bus Boy tell our story. As I reflected in my last post, Bus Boy’s life in Kosovo inspired me to find simpler, more basic ways to add flavor and excitement to my cooking. My 2011 cooking story can be summarized as a new appreciation and love for simplicity. I started 2011 in love with the challenge of preparing complicated recipes that forced me to find unusual and exotic ingredients and master detailed preparations. The specificity and detail of the recipes of genius chef’s such as Thomas Keller inspired me. I will always feel an exhilarating sense of excitement and accomplishment when I master such recipes. However, I now feel an equally intense sense of satisfaction in developing simpler recipes. My top ELEVEN (recipes) of 2011 mix interesting flavors from accessible ingredients. Some are easier to prepare and more nutritious than others but all are worth tasting. If you didn’t catch these recipes the first time around, start 2012 with a bang and enjoy them today!
My top ELEVEN of 2011
Shitake “Bacon”
1 pound Shitake mushrooms, thinly sliced
2 tablespoons Shoyu
1 tablespoon Extra Virgin Olive Oil
Salt
Toss shiitake mushrooms with 2 tablespoons shoyu and 1-tablespoon olive oil. Let sit for ten minutes. Strain the shoyu-soaked mushrooms and spread evenly on a sheet pan. Bake for thirty minutes in a 375-degrees oven. The mushrooms should be crispy and shriveled without being burnt. Transfer them to a dish.
Roasted Pepper and Shitake “Bacon” Sicilian Pizza
serves 6 to 8 people; makes 1 large square pizzas, active time 1 hour, total time 3 hours, including prep time and rise of dough
- For the dough:
- 1 medium russet potato, about 7 ounces
- 15 ounces (3 cups) all-purpose flour
- 1/2 ounce (about 2 teaspoons) kosher salt
- 1/4 ounce (about 1 1/2 teaspoons) rapid-rise yeast
- 1/2 ounce (about 3 teaspoons) sugar
- 1/2 cup extra-virgin olive oil
- For the sauce:
- 1/4 cup extra-virgin olive oil
- 4 medium garlic cloves, smashed
- 1 (28-ounce) can whole peeled tomatoes packed in tomato juice, drained
- 2 teaspoons dried oregano
- 1/2 teaspoon red pepper flakes
- 4 sprigs basil, leaves and stems reserved separately
- Kosher salt
- 1/2 pound (about 2 cups) shredded mozzarella cheese
- For the cheese:
- 1 ounce finely grated Parmesan cheese (about 1/2 cup)
- 8 ounces whole milk mozzarella, shredded (about 2 cups)
- 8 ounces smoked gouda, shredded (about 1 cup)
- For the toppings:
- Shitake bacon
- ¼ pound shitake mushrooms, stems removed, sliced ¼ inch
- ½ tablespoon shoyu
- 1 tablespoon extra virgin olive oil
- Roasted peppers
- 1 medium red bell pepper
- 1 tablespoon extra virgin olive oil
Procedures
1. For the Dough: Place the potato in a medium saucepan and cover with cold water. Bring to a boil over high heat and cook until cake tester inserted into center meets no resistance, about 15 minutes. Pass through potato ricer into small bowl and allow to cool at room temperature for ten minutes. You should have 6 ounces of riced potato.
2. Meanwhile, combine flour, salt, yeast, sugar, and 2 tablespoons olive oil in bowl of stand mixer. Add 11.25 ounces (about 1 1/3 cup) water to mixer and mix on medium speed until it comes together and no dry flour remains. Add cooled riced potato, increase speed to medium-high and mix until the dough is stretchy and smooth, about 6 minutes. The dough should stick to the bottom of the bowl but pull away from the sides.
3. Pour remaining olive oil into rimmed baking sheet and spread over entire inner surface with hands. Transfer dough to baking sheet and rub top surface with oil until thoroughly coated. Cover with baking sheet with plastic wrap and allow to rise at room temperature until dough has spread out to touch nearly each rim of baking sheet, about 2 hours.
4. For the Sauce: While dough is rising, heat olive oil and garlic cloves in 8-inch skillet over medium heat until lightly bubbling. Reduce heat to low and cook until garlic is light brown and tender, about 10 minutes, flipping garlic cloves once during cooking. Transfer garlic cloves to bowl of food processor or blender (without the oil). Add drained tomatoes. Process or blend until roughly pureed, and set aside.
5. Transfer garlic-scented olive oil to large saucepan and heat over medium-high heat until shimmering. Add oregano and red pepper flakes and cook, stirring constantly until fragrant, about 1 minute. Add tomato mixture, sugar, and basil stems. Bring to a simmer, reduce heat to low, and cook, stirring occasionally, until slightly reduced, about 30 minutes. Season to taste with salt.
6. To Finish the Pizza: 30 minutes before baking, adjust oven rack to middle position and preheat oven to 500°F. Carefully remove plastic wrap from pizza dough. Using oiled hands and being as gentle as possible to maintain air bubbles, push and stretch the dough into the corners of the pan by pressing out from the center and lifting each corner and stretching it beyond the edge of the pan. It should pull back until the pan is just filled with dough.
7. Spread approximately 2/3 cup of sauce over top surface of pizza with back of spoon, leaving 1-inch border all the way around the edge. Sprinkle with half of Parmesan, focusing on edges of crust. Bake for 5 minutes, remove from oven, and spread mozzarella and smoked gouda evenly over surface. Dot more tomato sauce in irregular spots on surface (you may have extra sauce). Top with shitake “bacon,” roasted peppers, basil leaves and remaining Parmesan.
8. Return to oven and bake until crust is well browned and cheese is melted and lightly browned in spots, 10 to 15 minutes longer. Allow to cool at room temperature for 5 minutes. Transfer to a large cutting board (pizza may stick to pan at some point—use a spatula to carefully pry it off), cut into 8 or 12 rectangular slices, and serve.
Printed from http://www.seriouseats.com/recipes/2011/01/easy-no-roll-no-stretch-sicilian-style-square.html
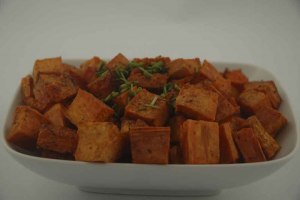
Coconut Oil Roasted Sweet Potatoes
Melissa Clark
Time: 1 hour 15 minutes
Yield: 2 to 4 servings.
1 1/2 tablespoons virgin coconut oil
1 3/4 pounds sweet potatoes, peeled and cut into 1/2-inch chunks
2 teaspoons light brown sugar, packed
3/4 teaspoon kosher salt
1/4 teaspoon ground black pepper
1/4 teaspoon grated nutmeg.
1. Heat oven to 350 degrees. Melt the coconut oil in a small saucepan over low heat.
2. In a large bowl, toss together potatoes, coconut oil, sugar, salt, pepper and nutmeg.
3. Spread the potatoes in an even layer on a large baking sheet. Roast, tossing occasionally, until soft and caramelized, about 1 hour.
Ramp Pesto With Parmesan
Time: 10 Minutes
Yield: Serves 2-4 People
10 ramps
½ cup toasted walnuts
½ cup grated parmigiano-reggiano cheese
½ cup olive oil
½ teaspoon sea salt
Pepper, to taste
Thoroughly wash the ramps. Remove any loose or discolored skin that clings to the bulbs.
Trim off the roots of the ramp and remove the leaves.
Roughly chop the walnuts and the bulb, stalk and leaves of the ramp.
Optional step: sauté the bulb and stalk of the ramp in a tablespoon of olive oil. After one minute add the leaves. Cook together for another minute. Remove from heat to cool. This step will diminish the naturally intense flavor of the ramp.
Add the ramps, walnuts, cheese and salt to a food processor or blender. Pour the olive oil in slowly while processing contents until the pesto has a rough texture. Do not puree the mixture.
Add pepper to taste and process for another five seconds.
Enjoy on top of bread, pasta, salad or fish.
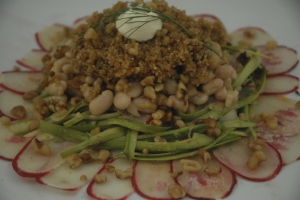
Fennel Quinoa Salad With Shaved Asparagus, Turnips and Walnuts
Adapated from Melissa Clark’s recipe, Creamy Mussel Stew With Peas, Fennel and Lemon
Preparation Time: 15 minutes
Total Time: 45 Minutes
Yield: 4 Individual Salads
FOR THE VINAIGRETTE:
6 tablespoons extra virgin olive oil
2 tablespoons Dijon mustard
6 tablespoons lemon juice, or as needed
Finely grated zest of a lemon
1 tablespoon Pernod
1/2 teaspoon ground fennel seed
FOR THE SALAD:
2 cups cooked cannellini beans, drained
Salt and pepper
Red pepper flakes
6 to 8 large, fat asparagus spears, snapped and peeled
6 radishes
2 large fennel bulbs
FOR THE QUINOA:
2 tablespoons extra virgin olive oil
1 large leek, white part only, cleaned and finely chopped
4 garlic cloves, smashed and peeled
3/4 cup dry white wine
3 tablespoons Pernod
2/3 cup vegetable stock
1 ½ cups dry quinoa
4 tablespoons crème fraîche
1. To make the vinaigrette, whisk together the vinaigrette ingredients. Adjust lemon juice, salt and pepper to taste.
2. Place the beans in a large bowl. Pour half the vinaigrette over the beans and toss lightly. Season with salt, pepper and red pepper flakes.
3. Using a sharp mandolin — and a hand guard — carefully slice the asparagus spears lengthwise to about the thickness of a penny. Slice the radishes and fennel to the same thickness. Lay the shaved vegetables in a shallow bowl. Season with salt and pepper, and dress them very lightly with a few spoonfuls of vinaigrette, turning gently to coat. Set aside.
4. Chop and reserve 1/4 cup fennel fronds. Peel and discard the outer layers from the bulb, then finely chop the bulb and coarsely chop the stems.
5. Heat the oil in a large pot over medium-high heat. Add the chopped fennel bulb, leek and garlic cloves. Cook until the fennel and leek are golden, 5 to 7 minutes. Add the pepper flakes and cook 30 seconds. Stir in the fennel stems, wine and Pernod. Cook, stirring to scrape up any browned bits from the bottom of the pan, 2 minutes.
6. Strain the liquid in the pot through a fine sieve into a small saucepan, pressing down on the solids with a spoon. Add the stock and bring to a simmer over medium heat. Stir in the lemon zest, salt and chopped fennel fronds. Cover to keep warm.
7. Wash the quinoa and drain it well
8. Heat a small saucepan over medium-low heat. Add the quinoa and cook, stirring constantly, until the grains are dry and fragrant, about 5 minutes. Then add the broth, scraping up any grains that have stuck to the bottom. Cover, and simmer until the quinoa is tender, about 15 minutes. Do not stir the quinoa while it is cooking, to allow it to cook evenly and steam holes to form.
9. To assemble individual salads, line a plate with sliced vegetables, cover the vegetables with the ½ cup beans and 3/4 cup quinoa. Sprinkle with walnuts and top with a 1 tablespoon of crème fraîche.
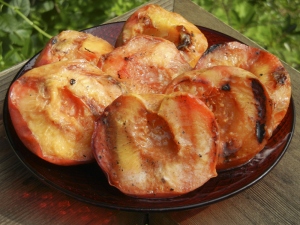
Rum Glazed Grilled Peaches
reparation Time:10 minutes
Total Time: 20 minutes
Yield: Serves 8
4 large not too ripe peaches (if peaches are too soft they will fall apart on the grill!)
4 tablespoons (1/2 stick) unsalted butter, melted
1/4 cup firmly packed light brown sugar
1/2 cup rum
1/2 teaspoon ground cinnamon
Pinch ground nutmeg
1. Prepare grill for direct-heat cooking over medium-hot charcoal or medium-high heat for gas.
2. Rinse peaches and blot dry with paper towels. Cut each peach in half and discard pits.
3. Combine butter, brown sugar, rum, cinnamon and nutmeg in a saucepan and bring to a boil over high heat. Allow for both the butter and the sugar to melt together. Stir and remove from heat and allow to cool.
4. Grill peaches until nicely browned, 3 to 4 minutes per side, basting with rum butter glaze. Serve at once, spooning any remaining glaze over the grilled peaches.
Cooks’ note: If you aren’t able to grill outdoors, peaches can be cooked in a hot oiled large (2-burner) ridged grill pan over medium heat.
Quinoa Tabbouleh with Mint and Pistachios
Yield: Serves 6
Preparation Time: 25 minutes
Total Time: 30 minutes
½ cup quinoa
3 tablespoons lemon juice
3 tablespoons extra-virgin olive oil
1 1/3 cup finely chopped pistachios
1 cup finely chopped curly parsley
1 small cucumber, finely chopped (1 cup)
1 medium tomato, finely chopped (1/3 cup)
4 green onions, finely chopped (1/3 cup)
1/3 cup finely chopped fresh mint
1. Wash the quinoa and drain it well.
2. Heat a small saucepan over medium-low heat. Add the quinoa and cook, stirring constantly, until the grains are dry and fragrant, about 5 minutes. Then add the water and ½ teaspoon salt, scraping up any grains that have stuck to the bottom. Cover, and simmer until the quinoa is tender, about 15 minutes. Do not stir the quinoa while it is cooking, to allow it to cook evenly and steam holes to form.
3. In a large bowl combine the cooked quinoa with the lemon juice and olive oil. Fluff quinoa with fork, and stir in pistachios, parsley, cucumber, tomato, onions and mint.
4. Season with salt and pepper. Adjust seasoning to your own taste.
Tomato Sauce with Onion and Butter
By Marcella Hazan
Preparation time: 5 minutes
Total time: 55 minutes
Yield: For 4 servings
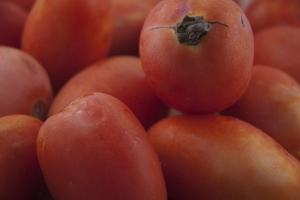
2 pounds fresh Plum tomatoes, prepared as specified below
OR
One 28-ounce can imported Italian plum tomatoes, cut up with their juice
5 tablespoons butter
1 medium onion, peeled and cut in half
Salt
Prepare your fresh tomatoes:
1. Boil water in a large pot.
2. Plunge the tomatoes in boiling water for a minute or less (you will see the skins of the tomatoes burst under water).
3. Drain them, and, as soon as they are cool enough to handle, skin them, and cut them up in coarse pieces. (I also like to core my tomatoes prior to cutting them up into pieces).
Make your sauce:
1. Put either the prepared fresh tomatoes or the canned in a saucepan
2. Add the butter, onion, and salt, and cook uncovered at a very slow, but steady simmer for 45 minutes, or until the fat floats free from the tomato. Stir from time to time, mashing any large pieces of tomato with the back of a wooden spoon against the side of the pot.
3. Taste and correct for salt. Discard the onion.
4. Cover your pasta (about 1 pound) with 1 tablespoon of butter. Toss your pasta with the sauce.
Cook’s Note: If you freeze the sauce discard the onion prior.
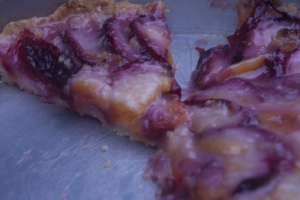
Plum Tart
Minimally Adapted from Amanda Hesser’s “Peach Tart,” food52.com
Preparation Time: 15 min
Total Time: 60 min
Yield: One 11-inch tart, serves 8
1 1/2 cup plus 2 tablespoons all-purpose flour
3/4 teaspoon kosher salt
3/4 cups plus 1 teaspoon sugar
1/4 cup vegetable or canola oil
1/4 cup mild olive oil
2 tablespoons whole milk
1/2 teaspoons almond extract
3 tablespoons cold, unsalted butter
3 to 5 ripe black plums, pitted and thickly sliced (about ½-inch)
1. Heat the oven to 425 degrees.
2. In a mixing bowl, stir together 1 1/2 cups flour, 1/2 teaspoon salt and 1 teaspoon sugar. In a small bowl, whisk together the oils, milk and almond extract. Pour this mixture into the flour mixture and mix gently with a fork, just enough to dampen; do not over work it. Then, transfer the dough to an 11-inch tart pan (you can use a smaller one if needed). Working quickly, use your hands to pat out the dough so it covers the bottom of the pan, pushing it up the sides to meet the edge. It should be about 1/ 8-inch thick all around.
3. In a bowl, combine 3/4 cup sugar, 2 tablespoons flour, 1/4 teaspoon salt and the butter. (If your peaches are especially juicy, add 1 tablespoon additional flour.) Using your fingers, pinch the butter into the dry ingredients until crumbly, with a mixture of fine granules and tiny pebbles.
4. Starting on the outside, arrange the plums overlapping in a concentric circle over the pastry; fill in the center. The peaches should fit snugly. Sprinkle the pebbly butter mixture over top (it will seem like a lot).
5. Bake for 35 to 45 minutes, until shiny, thick bubbles begin enveloping the fruit and the crust is slightly brown. Cool on a rack. Serve warm or room temperature.
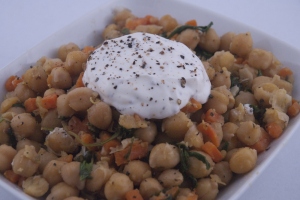
Chickpea Sauté with Greek Yogurt Sauce
Adapted from Yotam Ottolenghi’s “Chickpea sauté with Greek yogurt,” Plenty, all rights reserved 2010
Sauté :
2 tablespoons olive oil
4 medium carrots, peeled and diced in 3/8-inch diced (about 2 cups)
1 teaspoon fennel seeds
4 cups baby spinach, rinsed
4 cups arugula, rinsed
1 1/2 cups freshly cooked chickpeas (canned are fine too)
1 garlic clove, minced
1 tablespoon finely chopped mint
1 tablespoon finely chopped cilantro
1 tablespoon lemon juice
sea salt and black pepper, to taste
Sauce:
1/2 cup Greek yogurt
1 tablespoon olive oil
sea salt and black pepper, to taste
1. Heat the olive oil in a large, heavy saucepan. Add the carrots and fennel seeds and sauté for 5 minutes on medium heat.
2. Add the spinach, arugula and chickpeas and continue cooking for 6 minutes.
3. Add the garlic, herbs, lemon juice and some salt and pepper. Stir and remove from the heat. Cool enough to taste. Adjust seasoning as needed.
4. Mix together the yogurt, olive oil and some salt and pepper.
5. To serve, pile the vegetables on a serving dishes and spoon the yogurt on top. Sprinkle with freshly ground pepper and drizzle over more olive oil.
Romaine and Roasted Pear Salad with Fennel, Walnuts, Blue Cheese and Lemon-Mint Vinaigrette
Adapted from Cook’s Illustrated, Romaine and Roasted Pear Salad with Fennel and Lemon Vinaigrette, November 1, 2000
Roasted Pears
4 firm Anjou pears or Bartlett pears (about 2 pounds)
1 tablespoon unsalted butter, melted
2 tablespoons granulated sugar
Salad
1 ½ tablespoons extra-virgin olive oil
1 tablespoons minced fresh mint leaves
1 teaspoon grated lemon zest
1 ½ tablespoons lemon juice from 1 lemon
½ teaspoon table salt
Ground black salt
1 head romaine lettuce, washed, dried and torn into bite-size pieces (about 8 cups)
1 small bulb fennel (about 8 ounces), stems, frond, and base trimmed; bulb halved, cored and sliced thinly as possible (about 1 ¼ cups)
1cup walnuts, chopped coarse and toasted in small dry skillet over medium heat until lightly browned and fragrant, about 3 minutes
4 ounces blue cheese, crumbled
1. For Roasted Pears: Adjust oven rack to lower-middle position, place baking sheet or broiler pan bottom on rack, and heat oven to 500 degrees.
2. Peel and halve each pear lengthwise. With paring knife or melon baller, remove core. Set each half cut-side down and slice lengthwise into fifths.
3. Toss pears with butter; add sugar and toss again to combine. Spread pears in single layer on preheated baking sheet, making sure each slice lies flat on surface. Roast until browned on bottom, about 10 minutes. Flip each slice and roast until tender and deep golden brown, about 5 minutes longer. Let pears cool while preparing salad.
4. For Salad: Whisk together oil, mint, lemon zest and juice, salt, and pepper to taste in small bowl.
5. Combine romaine and fennel in large serving bowl. Add vinaigrette and toss gently to combine; scatter pears, blue cheese and walnuts on top. Serve immediately.
Layers of my Life in Lasagna
December 12, 2011 § Leave a comment
I started 2011 in need of a project. My struggle to find fresh, satisfying and inventive vegetarian options as a child led me to a fascination with food and cooking at a young age. Through my cooking and eating adventures, I discovered food and flavor combinations that inspired many stories and recipes. The result of these reflections was this blog. The New York Times guided my blog. Bus Boy changed it.
Reviewing my blog posts for the last 11 months, I had no idea when I began that I would find myself compelled to post five recipes in one week in the name of discovering the “best recipe” – whether it be an asparagus recipe, a pizza dough recipe or a tomato sauce recipe. (In case there is any doubt, I am a perfectionist!) I also had no idea that Bus Boy would “derail” my challenge. At the beginning of the year I created a self-imposed deadline and did not miss one week of adapting a New York Times recipe. Working on my own schedule after I met Bus Boy I gained a new perspective that resulted in a decision to strive for simpler creations. Once Bus Boy left for Kosovo, my focus shifted again (if only slightly), as I focused on recipes that Bus Boy could attempt with the more limited resources available to him. The gradual shift of focus toward simpler recipes and simpler ingredients made me re-think my food choices and appreciate the advantages I enjoy by living in the food-rich city of NYC.
My review of my blog posts reminded me of a promise to make Bus Boy my family recipe for vegetarian lasagna. During our pizza tour this summer, we debated the importance of tomato sauce and cheese on a slice of New York Pizza and in lasagna. Bus Boy argued that it was the choice of cheese that makes a pizza and lasagna special. I argued that it was the sauce – and studied sauce in this blog as a result. The debate was put to rest when I commented, “You cannot make a judgment on lasagna until you try MY lasagna.” He responded, “The next time I am in NYC, you can make your lasagna and we will continue this debate.”
I decided that lasagna, accompanied by the salad I prepared last week, would be Bus Boy’s first meal when he returned to the United States. The recipe for lasagna is an obsession with me and compelled me to try at least three different lasagna recipes for this blog. I learned to cook making lasagna and, over the years, it has been a reflection of how my tastes and cooking skills have changed and matured. Ingredients have been added while others have been taken away. Lasagna itself, however, is still representative of home, warmth and even decadence.
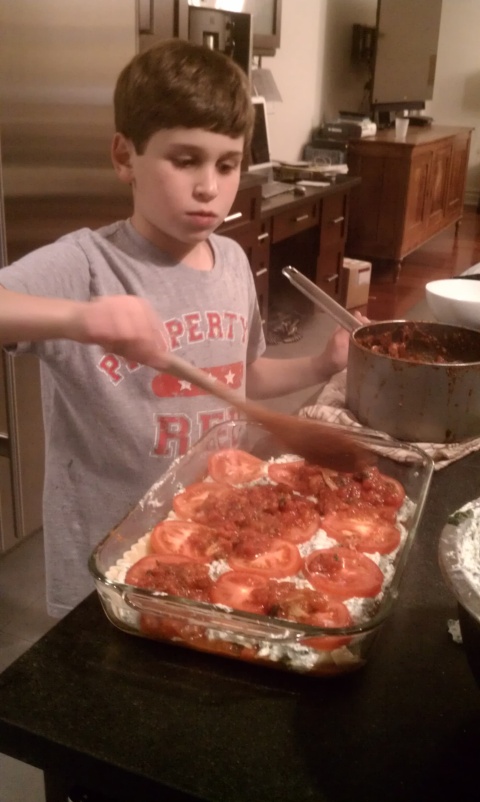
I called on my favorite 8 year old sous chef, Max, for a lasagna test-run. A cooking enthusiast and Italian food expert, I knew I could count on Max for his unfiltered opinion and overall good spirits in the kitchen. Convincing Max that vegetable lasagna could trump meat lasagna, however, was my first hurdle. Max frowned upon including tomatoes in the lasagna. He very distinctly expressed that he did not like tomatoes. When I asked if he liked tomatoes sauce a huge smile covered his face. In an effort to change his mind we started by making tomato sauce.
Making sauce is a fun and easy activity that I knew Max would enjoy. Max watched carefully and skeptically as I chopped the tomatoes. I taught him how to both peel and crush garlic with the back of a wooden spoon and gave him the freedom to add as much fresh oregano to the sauce as he saw fit. He performed all these tasks with great vigor. When asked, he enthusiastically stirred the sauce and kept watch as it simmered, prepared to call for me if it started to splatter.
Once completed, I asked Max to taste the sauce. Very serious about the task at hand, he took a teaspoon out of the drawer, carefully dipped it into the sauce and tasted. He took a long pause, looked at me seriously and said, “a little more salt.” I complied and then got the thumbs up. To get a second thumbs regarding the inclusion of tomato slices in the lasagna I covered one slice with the sauce and encouraged Max to try the combination. Although skeptical at first, he loved the combination and approved the inclusion of tomatoes.
We quickly mixed the ricotta with various spices and steamed spinach and set-up for the assembly. I left this final task all up to Max’s artistry and precision.
He delicately separated the noodles and layered them vertically, precisely placed the sliced tomatoes and evenly spread the sauce and the cheese.
Convinced we had a success on our hands we started on dessert while the lasagna baked in the oven. The entire kitchen smelled of tomatoes and cheese. Unfortunately, somewhere between scraping the gooey marshmallow rice krispies from the pot and setting the table there was a mishap. Let’s just say that the oven ate our lasagna. Max looked at the charred lasagna and, perhaps not totally convinced about the choice of this vegetable dish, said, “Next time let’s make penne vodka.” Rice krispie squares for dinner was fine with Max – but I will have to be more careful when making my lasagna for Bus Boy!
Simple Tomato Sauce
Preparation Time: 10 minutes
Total Time: 25 minutes
Yield: Enough for 1 Lasagna or 8 individual servings
2 tablespoons extra-virgin olive oil
Two 28-ounce can imported Italian plum tomatoes, cut up with their juice
8 garlic cloves
8 dried red peppers
2 teaspoon dried oregano
salt, to taste
chopped fresh oregano, to taste
1. Heat the olive oil over medium heat in a large saucepan. Whack the garlic cloves with the side of a knife and add to oil. Cook, shaking the pan, until the garlic is lightly browned, about 3 minutes. Do not let the garlic burn!
2. Raise the heat. Pour in the tomatoes, add the peppers and dried oregano, and season lightly with salt. Bring to a boil and adjust the heat to a lively simmer. Cook 10 minutes. Remove from heat. Fish out the dried peppers. Stir in the fresh oregano and let stand for 5 minutes.
Simple Vegetarian Lasagna
Preparation Time: 10 minutes
Total Time: 55 minutes
Yield: 1- 13 x 9 inch Lasagna
1 – 32 ounce container of part-skim ricotta cheese
2 Eggs
11/2 tablespoons cilantro
1 tablespoon dill
11/2 tablespoons parsley
1 teaspoon rosemary
1 tablespoon sage
a pinch red pepper flakes
1 tablespoon thyme
12 ounces frozen baby spinach, thawed
12 ounces low moisture whole-milk mozzarella cheese, shredded (about 3 cups)
2 tablespoons chopped fresh basil
6 medium vine-ripe tomatoes
12 no-boil lasagna noodles
1. Adjust oven rack to middle position and heat oven to 375 degrees. Spray 13 by 9-inch baking dish with olive oil or Grapeseed oil spray.
2. Stir to combine ricotta and eggs. Add spices and spinach to ricotta and stir until combined.
3. Cut each tomato into 4 thin slices.
4. Spread 1 cup sauce in bottom of baking dish; shingle 4 noodles on top of sauce. Spread half of cheese mixture over noodles, followed by 12 tomato slices and 1 cup of mozzarella. Repeat layering with 4 noodles, 1 cup sauce, remaining cheese mixture, remaining tomatoes and 1 cup mozzarella. Place remaining 4 noodles on top layer of cheese. Spread remaining 1 cup sauce over noodles and sprinkle with remaining 1 cup mozzarella. Lightly spray large sheet of aluminum foil with vegetable oil spray and cover lasagna.
5. Bake until -bubbling, about 45 minutes. Cool on wire rack 25 minutes. Cut into pieces, sprinkle with basil, and serve.
Coming Home to Fennel
December 7, 2011 § Leave a comment
After three months in Kosovo, Bus Boy is finally coming home – well, my home in New York City. My initial inclination was to take the city by storm and continue to explore our list entitled, “this is my last week in New York City.” After a thoughtful conversation with Bus Boy, however, we decided to choose our activities carefully and allow ourselves time to be a “normal” couple. For us, normal includes long walks with Viva (my puppy), visiting “old haunts” (a trip to The Surrey for drinks is a must!) and cooking.
First, however, I needed to prepare for Bus Boy’s first meal in New York City. His plane would land at 6:00PM on a Saturday night after a fourteen-hour trip. My mind raced with ideas. I knew I could not make anything with apples – he is still working his way through the barrel of apples he acquired from the farmer’s market! I also would not make anything with tomato sauce. After testing my recipes he has mastered his own sauce and eats it with various carbohydrates and proteins multiple times a week.
Staying away from apples and tomato sauce is easy enough but still, choosing foods full of fresh flavor is a broad category – a category I have been exploring for the past 11 months in this blog. Rather than torture myself narrowing down hundreds of options, I asked Bus Boy what he would you like to eat. His answer: “All I want to eat while in the United States is fresh fruit and vegetables.” His answer did not narrow my choices but it is clear that he is dating the right girl!
After considering dozens of recipes, David Tanis‘ New York Times article, “Fennel Fills In For Salads in Fall” focused my attention on fennel. What a great vegetable to get the taste-buds going! In addition, I know Bus Boy can not find fennel at the Kosovo farmer’s market. My challenge for this blog and Bus Boy’s welcome home meal was settled. I would focus on fennel.
The strong licorice-like flavor of fennel adds interest and flare to countless vegetarian dishes. I developed my favorite fennel recipe, ” Fennel Quinoa Salad With Shaved Asparagus, Turnips and Walnuts” for this blog. Infusing quinoa with the flavor of fennel made the vegetarian staple something special. Along with quinoa I often add fennel to soups, dressings and marinades. I agree with David Tanis, however, that the best way to truly enjoy and appreciate fennel is to slice it thinly; dress it lightly; and allow the natural flavor to wow friends and family.
To satisfy Bus Boy’s craving for fruit and vegetables and to encourage the reawakening of his taste buds I decided to experiment with a flavor-filled pear, romaine and fennel salad garnished with walnuts in a lemon-mint dressing. Baking firm pears slices coated in butter and sugar in a 500-degree oven caramelized the fruit to perfection. The sweet but not syrupy fruit pieces contrasted perfectly with the bitter fennel. The walnuts added great texture and my yearning for a satisfying crunch and the dressing added just a hint of unexpected flavor. All of the flavors and textures melded together beautifully and were delicious, satisfying and refreshing. Yet, I still felt like there was something missing.
The obvious answer was to follow tradition and add blue cheese. A distinctly flavored, salty blue cheese would be a great compliment to the sweet caramelized pears. Bus Boy also loves strong cheese flavors! Bus Boy and I went grocery shopping together only once this summer to prepare for a meal. Keen on a pear and blue cheese salad we began our journey at the cheese counter for some taste tests. With each taste of blue cheese Bus Boy grew increasingly unsettled. He started simply by asking for a taste of a “nice” blue cheese to pair with pears. The mild flavor and creamy texture was unacceptable. For the second round he asked for a “stronger” blue cheese. I could not taste the difference between the “nice” and “stronger” blue cheeses making the second taste-test a failure. Finally, with no progress toward his objective, Bus Boy looked at the cheese clerk and said, “I would like to taste a truly offensive blue cheese.” Bingo! The clerk gave us a blue cheese that had matured for 15 months in dark caves in Spain. You could smell it as it was being unwrapped and it was, truly, offensive. It was perfect.
I crumbled the same “offensive” blue cheese on this salad and finally had the combination of sweet, bitter and salty flavors that I craved. I stored all of my ingredients in separate glass containers, placed them in the refrigerator and put together the salad again for lunch the next day just to be certain that my taste buds were not playing tricks on me. The ingredients stored perfectly and the salad was even better than I had remembered from the prior night. Without a doubt I would serve this salad to Bus Boy!
Romaine and Roasted Pear Salad with Fennel, Walnuts, Blue Cheese and Lemon-Mint Vinaigrette
Adapted from Cook’s Illustrated, Romaine and Roasted Pear Salad with Fennel and Lemon Vinaigrette, November 1, 2000
Roasted Pears
4 firm Anjou pears or Bartlett pears (about 2 pounds)
1 tablespoon unsalted butter, melted
2 tablespoons granulated sugar
Salad
1 ½ tablespoons extra-virgin olive oil
1 tablespoons minced fresh mint leaves
1 teaspoon grated lemon zest
1 ½ tablespoons lemon juice from 1 lemon
½ teaspoon table salt
Ground black salt
1 head romaine lettuce, washed, dried and torn into bite-size pieces (about 8 cups)
1 small bulb fennel (about 8 ounces), stems, frond, and base trimmed; bulb halved, cored and sliced thinly as possible (about 1 ¼ cups)
1cup walnuts, chopped coarse and toasted in small dry skillet over medium heat until lightly browned and fragrant, about 3 minutes
4 ounces blue cheese, crumbled
1. For Roasted Pears: Adjust oven rack to lower-middle position, place baking sheet or broiler pan bottom on rack, and heat oven to 500 degrees.
2. Peel and halve each pear lengthwise. With paring knife or melon baller, remove core. Set each half cut-side down and slice lengthwise into fifths.
3. Toss pears with butter; add sugar and toss again to combine. Spread pears in single layer on preheated baking sheet, making sure each slice lies flat on surface. Roast until browned on bottom, about 10 minutes. Flip each slice and roast until tender and deep golden brown, about 5 minutes longer. Let pears cool while preparing salad.
4. For Salad: Whisk together oil, mint, lemon zest and juice, salt, and pepper to taste in small bowl.
5. Combine romaine and fennel in large serving bowl. Add vinaigrette and toss gently to combine; scatter pears, blue cheese and walnuts on top. Serve immediately.
An Apple A Day
November 1, 2011 § Leave a comment
The script is right out of the movies. It is a perfect Fall day that calls for a sweatshirt or a light sweater. Bus Boy, excited by his adventure, drives to the farmer’s market in Kosovo in pursuit of fresh fruit and vegetables. Images of the Union Square Greenmarket and a refrigerator stocked with colorful fruits and vegetables dance in his head.
Upon arrival he forces himself to temporarily erase past memories of the Union Square Greenmarket and adjusts his expectations accordingly. He comforts himself with the idea of “fresher” ingredients than he has cooked with during his stay in Kosovo and continues on toward the lot of rusty vans.
Apples draw his attention. He confidently approaches a farmer, points to his beautiful bounty and asks, in broken Serbian, to purchase three apples. The farmer stares at him blankly and responds with a simple, forceful, “no.” Bus Boy makes a second request, hoping it is his accent or incorrect grammar that is eliciting such a forceful response. Again, the answer is “no.” They look at each other in silence, both seemingly confused. After a few moments the farmer picks up a barrel of apples and offers them to Bus Boy. He laughs and makes a large dramatic gesture to emphasize that he is only one person. The farmer is not amused and again offers him the barrel. This time Bus Boy takes the barrel, places is it on the ground and picks out three perfect apples. The farmer shakes his head in a definitive “no.”
Growing up in Massachusetts, visiting apple orchards in the Fall and even picking apples off the tree in my front yard were a regular part of my life. I love the sweet Macoun apples followed later in the season by Pink Ladys and nothing beats the refreshing tartness of a Granny Smith apple. While I may not have an opportunity to visit nearby orchards in New York City, I do have access to the best apples New York State has to offer at the Union Square Greenmarket. Forever a fan of taste tests, I bought a few varieties of apples last weekend ready to experiment. Inspired by a New York Times review of the cookbook, “The Apple Lover’s Cookbook” by Amy Traverso, I dreamed all of the amazing apple recipes that I could share this week.
On Friday afternoon I received a call from Bus Boy. We barely said hello before he announced that his first trip to the farmer’s market was a success – maybe too much of a success. He asked me for apple recipes – a lot of apple recipes. As you may have suspected Bus Boy did not buy three apples or even six apples but an entire barrel of apples. It is a good thing that apples last a long time. Lucky for Bus Boy they last even longer in the refrigerator. And we all know that he has plenty of space in his refrigerator.
Baked apples are a comforting, delicious, healthy and easy Fall dessert. Every October my mother would bake Courtland apples in a somewhat complicated recipe that included eight ingredients and two types of sugar that she adapted from “The Joy of Cooking.” They taste amazing but I wanted something that was simpler and excluded the sugar. I chose six apples – Courtland, Macoun, Pink Lady, Macintosh, Red Delicious and Granny Smith – for my taste test and filled them with five ingredients – cloves, cardamom, ginger, cinnamon and dried cranberries. I chose the flavors from my favorite apple pie ingredients! Once stuffed with just a pinch or two of the selected spices the apples went right in the oven for an hour. I took my taste test very seriously, carefully analyzing the sweetness, softness and overall appearance of the final product. Surprisingly, the baked Granny Smith had the most complex flavor. It had a nice sweetness, great texture (it didn’t turn into apple sauce) and just the right amount of raw apple favor. Eating the baked Granny Smith apple wasn’t quite like eating the stuffing of an apple pie but it was close – and healthier!
For every major Fall feast, including Rosh Hashanah, Yom Kippur and Thanksgiving, I make apple crisp and I never tire of it! It is a simple recipe that is half the work of making a pie and you can prepare the apple crisp crumble topping ahead of time and put it in the freezer to use later. This Yom Kippur, in a rush to finish the desserts before dinner, I didn’t peal the apples and, honestly, I didn’t notice a difference in taste. It is the perfect go-to recipe!
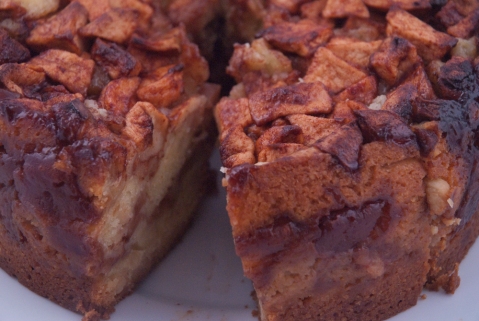
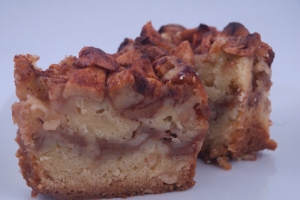
Finally, I baked an apple cake from the recipe collection of the famous blog Smitten Kitchen. This was the recipe that gave me the most problems (I made three cakes) but now that I have mastered its quirks I am happy to add it to my repertoire and share the recipe with you! The preparation for the cake is quite easy. It was the baking that was my problem. On my first attempt I kept the cake in the oven for too long which resulted in a very hard outer crust. On my second attempt I did not bake the cake long enough which resulted in half of the cake on the floor when I took the cake out of the pan. On my third, and only successful attempt, I took the cake out of the oven after exactly ninety minutes. Be certain that your oven maintains the accurate temperature throughout the baking process by peaking at an oven thermometer every thirty minutes! Once out of the oven, allow the cake to cool completely – nearly an hour! If the cake is even a little warm the top and bottom will come apart and the middle section of apples will spread across your counter when attempting to release the cake from the mold. Once cooled I was able to enjoy the moist cake literally filled with apples! My favorite part of this cake is the apple center and the crisp cinnamon soaked apples on top. If you are an apple lover this cake is definitely worth the time and effort.
Nutritionally, there is some truth to the famous saying, “an apple a day keeps the doctor away!” A medium apple (about 3 inches in diameter) is low in calories (95 calories per apple) and high in fiber (4 grams per apples). Additionally, apples are a good source of vitamin C and beta carotene. Nutritionist Caren recommends always carrying an apple with you in your purse or in your car. Without the fuss or mess of a fruit that needs to be peeled it is the perfect on-the-go snack!
I told Bus Boy to add an apple to his briefcase each day for a mid-morning or mid-afternoon snack and encouraged him to experiment in adding apples chunks in his yogurt, cottage cheese and even salads. Bus Boy was more anxious to test the three new recipes. I was happy to share with him some of my favorite recipes as well as my favorite childhood memories of picking apples. In the end, the farmer’s market negotiation was a blessing in disguise – creating a funny story and many recipes to share.
Classic Baked Apples
Preparation Time: 5 minutes
Total Time: 65 minutes
Yield: 4 Apples
4 large Granny Smith apples, (peeled optional).
Ginger, 2 pinches
Cinnamon, 2 pinches
Cardoman, 1 pinch
Cloves, 1 pinch
40 cranberries
1. Preheat the oven to 350 degrees.
2. Cut 1/4 inch off the top off each of the apples. Place the tops of each apple aside.
3. Fill the apples with 2 pinches of ginger and cinnamon, 1 pinch of cardoman and cloves and 10 cranberries.
4. Cover the apples with their tops and bake for 1 hour. The apples should be soft enough to easily place a knife through their center.
5. Allow to cool and enjoy!
Classic Apple Crumble
Preparation Time: 15 minutes
Total Time: 70 minutes
Yield: 10-12 servings
Topping:
2 ½ cups old-fashioned oats
1 cup (packed) light brown sugar
1 ½ teaspoons ground cinnamon
1 cup all purpose flour
1 cup (2 sticks) chilled unsalted butter, cut into ½-inch cubes
Filling:
4 pounds Granny Smith apples, peeled, halved, cored, each half cut into 6 slices
2/3 cup sugar
2 teaspoons ground cinnamon
1 teaspoon nutmeg
1 teaspoon allspice
1 teaspoon ground ginger
2 teaspoons vanilla extract
2 tablespoons all purpose flour
2 tablespoons unsalted butter, melted
Vanilla ice cream
1. Preheat oven to 375°F. Spray 13 x 9 x 2 inch glass baking dish with nonstick spray.
2. Mix oats, brown sugar, and flour in a bowl. Add butter rub in with fingertips until topping comes together in moist clumps. (This mixture can be made ahead. Cover and chill for 24 hours or freeze for months.)
3. Mix all filling ingredients in large bowl to coat apples. Transfer to baking dish. Sprinkle topping evenly over the apples as thick or thin of a layer as you desire . Freeze any leftover topping for future use.
4. Bake until the apples are tender and the topping is brown and crisp, about 55 minutes. Cool slightly. Spoon warm crumble into bowls. Serve with ice cream.
Classic Apple Cake
very minimally adapted from “Mom’s Apple Cake,” smittenkitchen.com, Tuesday, September 30th, 2008
Preparation Time: 15 minutes
Total Time: 75 minutes (plus 60 minutes to cool)
Yield: 6-8 servings
6 McIntosh apples, peeled, cored and chopped into chunks
1 tablespoon cinnamon
5 tablespoons sugar
2 3/4 cups flour, sifted
1 tablespoon baking powder
1 teaspoon salt
1 cup coconut oil (grapeseed or vegetable oil are great alternatives)
2 cups sugar
1/4 cup orange juice, room temperature
2 1/2 teaspoons vanilla
4 eggs, room temperature
1 cup walnuts, chopped (optional)
1. Preheat oven to 350 degrees and grease a tube pan with butter.
2. Toss apples with cinnamon and sugar and set aside.
3. Stir together flour, baking powder and salt in a large mixing bowl and set aside.
4. If not already liquefied, melt the coconut oil in a small saucepan over a low heat and allow to cool. In a medium bowl, whisk together oil, orange juice, sugar and vanilla.
5. Mix wet ingredients into the dry ingredients. Add one egg at a time. Scrape down the bowl to ensure all of the ingredients are incorporated.
6. Pour half of batter into prepared pan. Spread half of apples over the batter. Pour the remaining batter over the apples and arrange the remaining apples on top.
7. Bake for 90 minutes. Allow to cool COMPLETELY before releasing the cake from the pan.
The Magic of the Pomegranate
October 25, 2011 § Leave a comment
It is nearly two months since Bus Boy’s departure from NYC and we have fallen into some routines to stay connected. Bus Boy calls me half asleep from Kosovo at 5AM and I call Bus Boy at 11PM New York time when I too am half asleep. These late night/early morning conversations often turn esoteric and philosophical – the reasons for which are not entirely clear to me. During one of these epic conservations we discussed the pomegranate, the topic of my post this week.
According to my research, in some religions and cultures the pomegranate and its many seeds have great symbolism. In Christianity, it is sometimes said that the pomegranate is a symbol of both the church and the resurrection of Jesus – where the seeds represent the Church’s many believers and the seeds bursting from the fruit are likened to Jesus rising from the tomb. In Chinese culture, the pomegranate represents fertility and pictures of the fruit are often hung in homes to bless the dwelling with numerous offspring. Some scholars believe that in the biblical story of Adam and Eve it was a pomegranate that served as the symbol for temptation rather than an apple.
Personally, the pomegranate reminds me of my Sunday morning Hebrew school classes with Dr. Hilfiger. Dr. Hilfiger was a Hasidic Jew and a learned scholar who had a long white beard, round thick glasses, introspective eyes and an inviting smile. He listened to his liberal students and always set out to answer our questions thoughtfully and with consideration to our beliefs – which often diverged from his own. One year he taught a class on the religious significance of numbers in Judaism. Dr Hilfiger taught us that the pomegranate contained 613 seeds which corresponded with the 613 mitzvot or commandments in the Torah. Eating a pomegranate after Dr. Hilfiger’s class was almost a religious experience! With my mother’s help, I would carefully pull the seeds from the flesh, eating them one by one and counting them along the way. My hands would be red for days.
It has been a long time since I have thought about pomegranates. In NYC, without the help of my mother, I have avoided the effort and time needed for extracting the seeds from the fruit. That is until an article in the New York Times entitled, ” After His Brother’s Killing, a Chef Turns to Israeli Food” on Chef Michael Solomonov’s inspiring interpretation of traditional Israeli food reminded me of the sweet, crunchy bite of the pomegranate seed. Forget about the history of the pomegranate and the cultural and religious significance! Figuring out ways to incorporate the seeds into a recipe was a great challenge for the week.
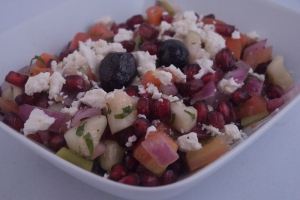
I bought one pomegranate (613 seeds are plenty for an experiment) and brainstormed about how to bring the crunchy bite and the sweet taste of the seed to a fall dish. Inspired by the idea of Israeli food, I added pomegranate seeds to a simple Israeli salad of cucumbers, tomatoes and red onions! The crunch of the seeds added texture to the simple salad and the sweetness of the seeds calmed the acidic dressing. The result was delicious and the pomegranate seed is now a new staple ingredient to my Israeli salad.
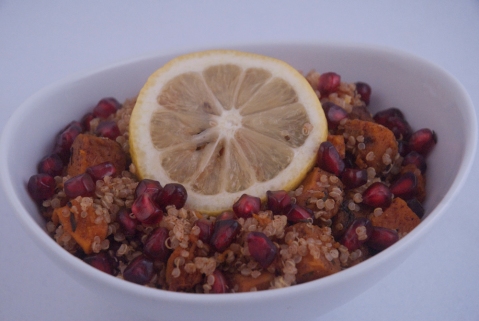
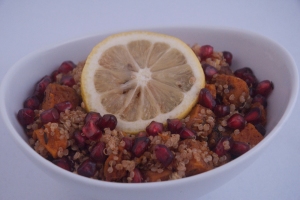
I then had an idea for another nutritious salad. Quinoa, my go-to nutritious grain, would be a perfect compliment to pomegranate seeds. While the Israeli salad emphasized the contrast between sweet and sour, I decided to work with a sweeter set of ingredients for this second dish. I combined roasted butternut squash, cinnamon, ginger and pomegranate seeds with the quinoa to make a balanced and sweet (but not too sweet) salad. It was light and full of flavor.
Fortunately, the small red seeds of the pomegranate are nutritious! So nutritious, in fact, Nutritionist Caren explains that they are often referred to as a super fruit. Pomegranate seeds are an excellent source of powerful antioxidants known as polyphenols – more specifically tannins, quercetin and anthocyanins – all of which are believed have anti-cancer and heart health benefits. Their high fiber content (3 grams of fiber for ½ cup of the seeds) and low calories (72 calories for ½ cup of seeds) also make this fruit great for weight management.
Bus Boy loved the ideas for the salads even though there was no way for him to test the recipes himself. Finding a pomegranate in Kosovo was out of the question. He also loved the symbolism of the fruit. As our conversation continued late into the night Bus Boy shared his thoughts on symbols and symbolism in religion and literature. Without skipping a beat, our conversation went from symbolism to signs to fate and ultimately to our “fated” meeting on that hot summer night at the bus stops. I explained to Bus Boy that it is hard for me to believe the saying “everything happens for a reason.” Bus Boy responded that he believes that everything in his life over the past few years led him to “our” bus stop – but he does not minimize the happiness, joy, pain and struggle that it took to get to that night. It amazes me how a conversation about the symbolism of a fruit led Bus Boy and I to discuss the meaning of fate – and yet Bus Boy was still uncertain about what a pomegranate looked like! When I sent him a picture of a pomegranate he let out an audible “ahhh.” Remember, it was 5 o’clock in the morning.
The pomegranate is a distinct looking fruit with a wonderfully distinctive taste. Take some time; find a partner to talk with; and extract seeds from a pomegranate. Try counting the seeds along the way. The creative possibilities and gastronomical delights with the pomegranate are endless!
Israeli Salad with Pomegranate Seeds
Preparation Time: 10 minutes
Total Time: 1 hour and 10 minutes (including allowing the salad to sit at room temperature)
Yield: Serves 4
2 plum tomatoes or 1 large tomato, diced
1 small green bell pepper, diced
1 medium cucumber, diced
fresh parsley, leaves picked but not chopped
½ small red onion, finely diced OR 3 scallions, finely sliced
2 tablespoons fresh lemon juice
2 tablespoons extra-virgin olive oil
salt and pepper to taste
1/2 cup pomegranate seeds
4 oz. feta cheese
1. Toss together all ingredients except for feta cheese in a large bowl.
2. Let sit at room temperature for 1 hour to allow flavors to develop.
3. Toss in the feta cheese just before serving, taste for seasoning and adjust seasoning, if necessary.
Sweet Quinoa Butternut Squash Salad with Pomegranate Seeds
Preparation Time: 5 minutes
Total Time: 25 minutes
Yield: Serves 6
2 cups butternut squash, peeled and cubed into small dice
1 tablespoon olive oil
1 cup uncooked quinoa
1 teaspoon ground cinnamon
1 teaspoon ground ginger
1 1/3 cup vegetable broth
1 teaspoon kosher salt and pepper
1/2 cup pomegranate seeds
6 slices of lemon
1. In a medium saucepan over medium heat, add the butternut squash and oil. Sauté until the squash begins to slightly soften.
2. Add the quinoa and spices to the saucepan. Lightly toast quinoa, stirring constantly, until golden and aromatic, about 1 minute.
3. Add vegetable stock and salt and pepper. Bring to a boil, cover and reduce the heat to low. Cook for 15 minutes or until the squash is soft and the quinoa is fluffy.
4. Toss the pomegranate seeds into the squash and quinoa mixture. Garnish with a lemon. Serve immediately or allow to cool to room temperature.
